Today, I'm posting a set of instructions to make a pincushion. I am making this as I am going to enter it for a WI competition in the summer. So. as I was going to do it for this, I thought that I might as well do the instructions and blog it as well. Lots of tutorials available on the
Craft Fairy Blog Being in posession of a huge choice of ribbons I really had no choice but to use them. All the ribbons that you see here are available from
craftfairy.co.uk
Here is the finished cushion.

I know that it is really girly and over the top kitch but who cares. I thought that if I was going to go for a domestic goddess kind of thing I might as well go over the top. 1950's at least. I even feel a frilly apron coming on. Perhaps not today though.
So. if you want to make something like this you will need to do some ribbon weaving first. This really is a good way to use up your scraps too as it only requires short lengths. the sort that are usually too short to be used for anything else.

Cut yourself a piece of fuisable interfacing about 2cm larger than the finished size of the pinchshion. E.g. if your pinchshion is to be 50cm then cut your square 12cm. I used a lightweight interfacing as I wanted the finished cushion to be soft not stiff.
Put the interfacing on the ironing board, fuisable side up. If your don't do it this way your will fuse it to the board. Lay your ribbons out in a pattern and pin to the ironing board over the interfacing.

Cut your lengths of ribbon so that they extend beyond the size of the backing fabric. You will trim them later so don't worry about being too precise. I used a mixture of widths and patterns but to keep the design looking good I used only three harmonizing colours. Pink, blue and a touch of white in the pattern. Lay them vertically over the interfacing.
Now weave the same pattern of ribbon in the horizontal direction as shown.

You should end up with what you see below.

Push the ribbons together so that there are no gaps showing and pin in place. You will need to do this or the ribbon will move when you iron it.

Cover the ribbon weaving with a cloth and press with the iron. Do not use steam. This will create enough adhesion to allow you to flip the ribbon weave over and then press again to cause a better adhesion and create your fabric. See below.

Now, flip the fabric over, and iron from the back. This will ensure that the ribbons stick to the interfacing really well.

Now, take a length of sewing thread with a knot in one side and sew a running stitch along one edge of the ribbon very close to the edge. When you have reached the end pull the thread to gather it to approximately the length of your 4 sides combined. 40 cm in my case. Secure the end of the thread.
Pin to the right side of the edge of the ribbon fabric. Tack the ribbon in place very near the edge. You will not reallt have a seam allowance on the ribbon. No need to have one really as the ribbon has a sewn edge should not frey. There will be a seam allowance on the ribbon fabric though.
Cut a piece of backing fabric that is the same size as the interfacing. I used a little broiderie anglais that I had in my scraps basket. With right sides together and the ribbon in the middle like a sandwich sew around three sided of the pincushion. I did this by hand as it really is too fiddly to even contemplate sewing on the machine.
When you have done this turn the pincushion around to the right side and fill with kapok or any other stuffing that you have. I had some left over from goodness knows when. Sew the last side into place from the back of the cushion and you have done.
More tutorials available on my
Craft Fairy Designs Blog


 Once all the ribbon is wound up and secured, tuck the ends underneath and sew them into place with a few small stitches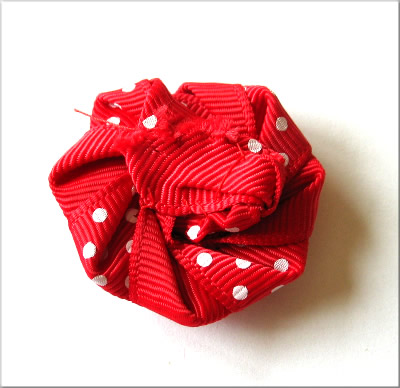
 Pull the thread gently until you have gathered the ribbon as shown below.
 Stitch the ribbon together along the middle and then stitch it to the back of your rose and there you have it.
 Now you can make a card or far better brighten up a jumper or a hat.

 I did stoop to pink for the thread that I used to gather the ribbon. I did this for a purpose though as it is easier to see in the photographs.


 Next fold the ribbon at a 90 degree angle to the roll as shown below.
 Roll the ribbon around the central bud until you get to the end of the folded part. It will be obvious when you do it. Secure the bottom with a couple of stitches. ,
 Fold and roll again and again. See below. Make sure to put in a couple of stitches as you go.Below is what your rose should look like after you have folded a few times.
 Now look at the back and you will see how this is coming along, and where to put the stitching.
 Basically you keep on going until you have as many petals as you want. The cut you r ribbon and tuck the raw wdge under and tack into place. Turn over and your ribbon is done.


