I’ve seen this done on YouTube by a lady called JewelsPaperJewels and thought it was a fantastic way to use all those ribbon scraps that you have left over (I tend to over estimate how much I need and if the ribbon is going on my first layer I don’t wrap it right around, shhhh!!)
The lady on the video can probably demonstrate this better than I can but here goes:
As I mentioned, I often wrap the loose ends around the back of my first layer. Then, I have these scraps left over. I’d say, approx. 1 1/2” is best to use for this technique.

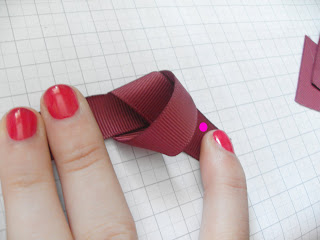
Then, if you did it the same as me with left over right, you take the pink dotted end now on the right, and tuck it up through the loop keeping the ribbon flat.

Then lay it flat on the work surface. It’s hard to see from the pictures but basically, where my thumb is in the picture above, that part has been put flat against the paper. Then tighten slightly by pulling on the ends but keep the knot open (see below)

Next, feed a scrap piece of ribbon keeping it flat through the loop you have just made.

And tighten !!

Then just trim nicely and voila!!
You can use different colours or even double up your scraps.
Happy recycling !


Hope you enjoyed this tutorial x


No comments:
Post a Comment