Wednesday, August 18, 2010

Recycled Vinyl Record - Photo Frame

vinylfame


Don't you love the nostalgia of old vinyl records? There are still many of those old darlings in my possession, but sometimes they're scratched. So I give them a second life as a piece of decoration (still very experimental at times, hee hee). Here's my first attempt to create a round photo frame, and that's how it works:


You need...

  • Vinyl record

  • Jigsaw

  • white pen

  • Embellishments - here: little wooden butterflies, old sheet music

  • hot glue gun

  • picture frame hanger

  • a nice photo


vinyl1Let the record have its very last turn on your record player. Take a pen which is visible on black, and hold it onto your record approximately 2.5 inches from the border. You'll get a perfect circle.


vinyl2Now cut along the line with a jigsaw or scroll saw. It doesn't matter where you start cutting, even if it severs the frame. You can hide the cut later on.


vinyl3If the frame got a rough edge like mine did, sand it with a Dremel or simply a cutter knife.


vinyl7The center part of the record can be turned into a heart - or any other shape you like.


IMG_2426I took old music sheets and tore them into strips. I inked the edges for a vintage look. Now you can add a strip of double-sided tape on the back ...


IMG_2427... and fold the note strips around the frame and press them on the tape.


vinyl6For the piano, paint a section of the inner record part white. I used a white pen, but I guess white spray would have looked more even. Let it dry and cut it into slightly wedge-shaped pieces. I made the black keys by eye measure.


vinylNow arrange your decorative elements on your vinyl frame. When it looks good to you, attach them with hot glue. Print a photo you like, trim it to the size of your frame and tape it to the back. Attach a picture frame hanger - and you're done!


You can use any embellishment you like, so you're not limited to this music-themed version. How about old book pages and chipboard letters as embellishments? Or something glittery for little girls? I'd really like to see what you come up with :)

Have lots of fun, and if you like this post, please take a minute to leave a comment (either here or at my original post). Thanks!

Anke

www.anke-art.de

Monday, August 16, 2010

Digital bookmark


I made this for my eldest as she is such an avid reader, printed off and laminated. I used the Digital Scrapbook Artist program, altering sizes and using a couple of different 'digipacks'. It shows how versatile this program is. I use it for scrapbooking, cardmaking, business cards and also decoupage amongst other things!

Thursday, August 12, 2010

Gift Bag Making

Today the lovely Arina from Arina's Card Corner has accepted to share with us her wonderful "Gift Bag Making Tutorial".  Here's how it goes:


Hi everyone here I am again with a post I saw yesterday on you tube a movie about how a bag can make an envelope.

So I thought to myself I'll also try to make an attempt to make the end I made two.

I have for you like a workshop, I explain step by step with pictures how to make the bag.
'm Curious what you think.

Workshop:
What you need an envelope, ribbon, designer paper, 2 brads, colored and afdrukjes.


Step 1: First glue the envelope shut, and then cut out of the sides about half an inch off.
 
Step 2:


then go on creasing 1.9 cm on both sides and the bottom is 2.5 cm.  Then you fold the crease lines here, but does so as well so you get a tight fold.


Step 3: then go on top briefly with a cartel scissors cut a piece off so you get a nice edge.
 
Step 4: Then you just run your hand into the bag and fold the crease lines on the sides and bottom and that should it look like.


Step 5: then make 2 holes on the sides of the ribbon, and then create the ribbon on your bag.


Step 6: Then decorate the front and back with the design paper, if you did go down the bottom flap so they stick.

And after you tie the ribbon around it, so the base of your bag ready and you can further decorate it yourself.

And below you see two of my creation programs I made.

1 it was made for a mother of a friend who is sick hyves.

You can do everything in, I've even made matching cards with which you have money, gift etc can put.


***************************
Arina has many other wonderful ideas over at -->her blog<-- that you might want to take a look at ;-)

How I made my Apple :)

Hi All Friends...it is nice I can writing in here again....

Today I have a tutorial how I made my Apple for my card.

First I try to found my stash red and green cardstock from my "stash Paper" box :)

Found it and I collected my "Apple" and "Leaf" Hand Puncher together from the drawer :)


Now I draw the APPLE with red copic and the leaf with my normal green Pen (also the stem) oops so sorry not so great Pict...I mean I am not so good in Drawing :) but at least you can see this is an Apple :)


Punched so many little Apple and little Leaf and collect it, also made a Stem for the Apple with brown paper.


Then I adhere all the LITTLE Apple to the BIG Apple and the LITTLE Leaf to the BIG Leaf. Oops so sorry again not so nice Pict...(no sunshine today :( )


Also this is the whole Apple I have finished


This is my whole card :)


Thanks for looking my tutorial...


I hope that you found my tutorial is useful.

If you like to see more project or cards please take a peak to my BLOG :)

Love,


Tuesday, August 10, 2010

Circle Slide Book Album

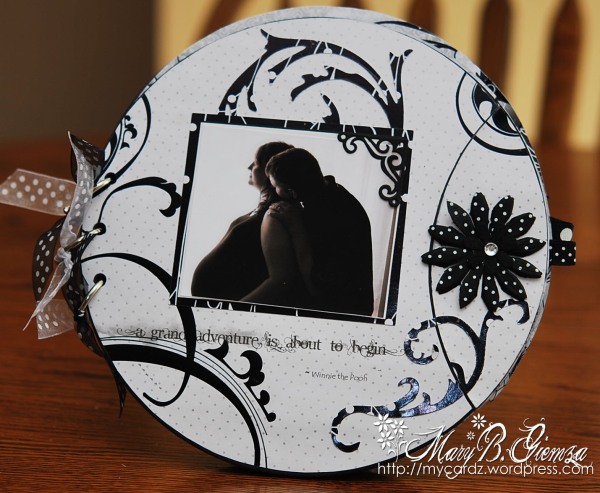
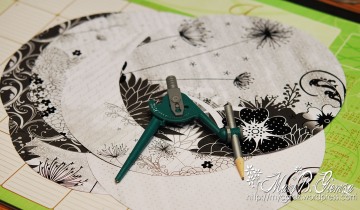
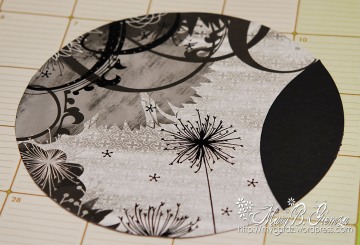
Mary Giemza is a very talented cardmaker...  and she has gladly accepted to share with us this lovely tutorial...  a Circle Slide Book Album.


Here's how it is done:

I’ve been really excited to share this photo album I made for my daughter who recently gave birth to the most beautiful little baby girl ~ Quinn (a/k/a Quinney poo)!
 
It’s not a normal album either ~ each page has a mini hidden slide-out photo page.   As soon as I saw it, I knew it would be perfect for an album keepsake for the whole family.      (Please keep in mind, I’m a card girl (My Cardz) and this is my FIRST attempt at scrapbooking!  Although, I do think I have discovered a NEW hobby!!)

Here’s how the “hidden” photo is revealed . . .    (it slides out!)


And a closeup view . . .


Pretty cool, huh?  These are photos of my VERY pregnant daughter from just a few weeks ago!   

In trying to not overwhelm you, I won’t show each and every photo from the album, since there are a total of six pages, PLUS six hidden photos.     I did, however, put together a wee-little slide show of the entire album which can be found at the end of this post!    Yep, just a proud grandma!

I just LOVE this type of album, I think it would make a perfect gift for Christmas, birthdays, new babies!   :)      The album is being sold over at I Brake For Stamps.  

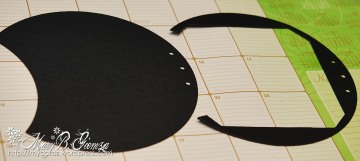
I have a few photos to show you how super easy it is to put together.   This is what you will receive in your package . . .


It may look confusing at first, but believe me ~  if I can do it  —  anyone can!      Your first step is to take one of the black chipboard spacers and a black chipboard circle . . .


and glue them together . . . always being sure to line up the punched holes.


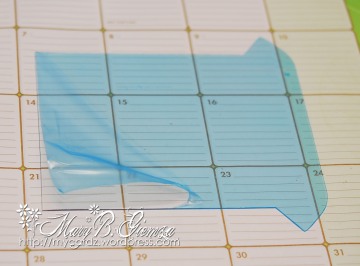
You then peel off the blue protective film from one of the clear pull outs . . .


and glue two black chipboard pull tabs to the front and back of the square end.   (I’ve left the film on so you could see it a little easier in this photo.)


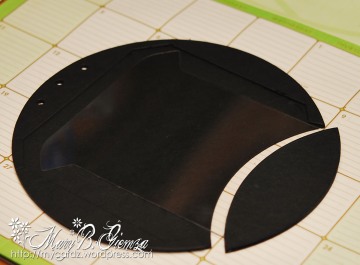
Lay this tabbed insert inside your glued circle as shown below . . .


and glue a second chipboard circle on top ~ always being sure to line up the punched holes.


That’s it!    (Of course, you have two more to put together.)     The album pages measure 8 1/2 inches, so I cut out all of my papers/cardstock  . . .


and used one of the chipboard pull tabs as a guide to cut this section to adhere to the album.


Since I was using double-sided papers, I marked the back of each piece so I would know which side I had planned to use.


And now the REAL fun begins!    Adding your photos and embellishments.    I decided to cover the clear plastic pull outs with DP also, which was not necessary – if you decide to do this, one little suggestion I have to make your life a little easier, cut and measure these BEFORE you glue your album together!   Live and learn!    If you do purchase one and run into ANY problems, please don’t hesitate to contact me and I’ll try to help.

************************************************************************

Now click -->here<-- if you want to see more of Mary's creations.